How to Assemble a Tiled or Block Poster
Enable cut guides and page labels before exporting your poster PDF. Print at Actual Size / 100%, then arrange the sheets in order.
Seamless poster or Framed grid?
Choose the joining method before exporting, then follow the cut guides for that layout. The two methods keep different parts of the paper:
| Assembly detail | Seamless poster | Framed grid |
|---|---|---|
| Finished appearance | One continuous image with no intentional spacing between panels. | Image panels separated by blank paper, with an optional outer border. |
| What to keep | With overlap, retain the repeated image strips on the right and bottom of adjoining sheets. | Retain the blank spacing between panels and any selected outer border. |
| How to join | Cover each repeated strip with the trimmed edge of the next sheet. Without overlap, join the image edges directly. | Bring the trimmed sheet edges together without overlapping or adding extra gaps. |
Seamless poster with overlap
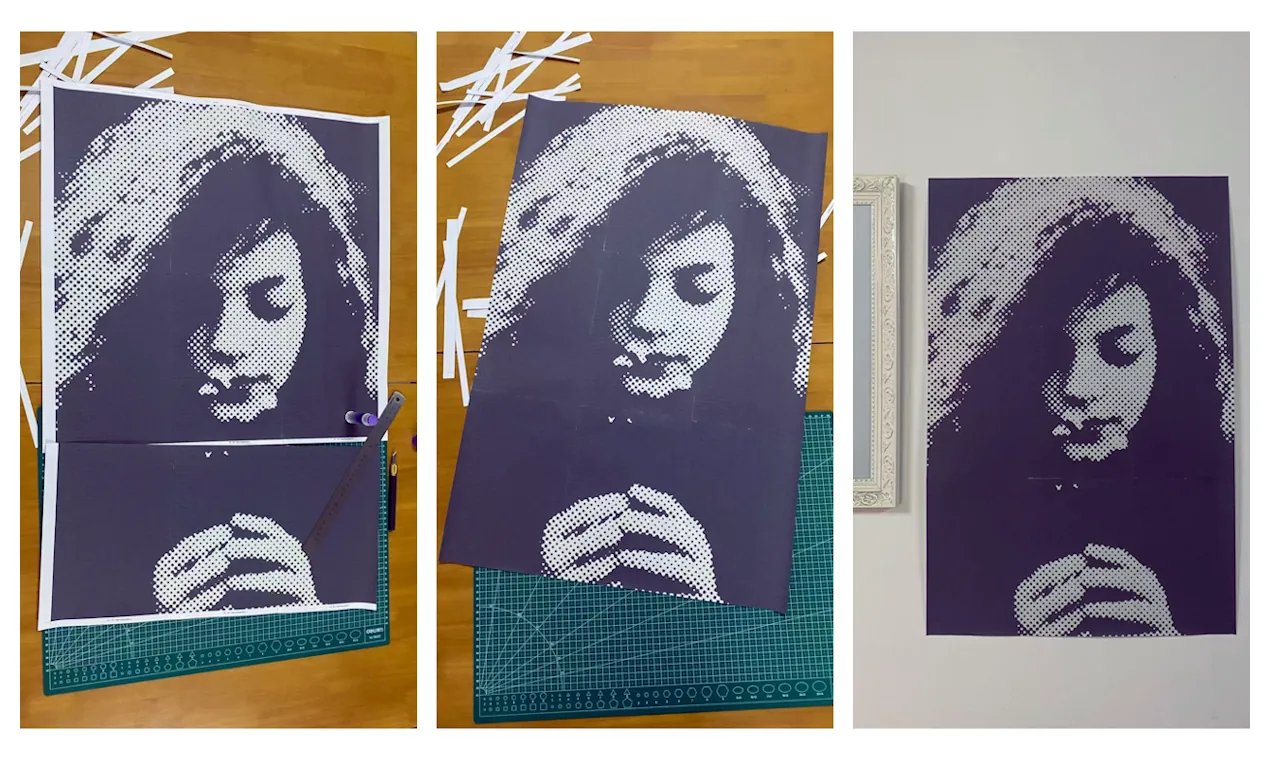
The real-print photos below show a Seamless poster assembled with overlapping edges. The repeated image strips help you align neighboring sheets, then sit underneath the incoming sheet. They do not add to the finished poster size. The paper seams may still be visible up close, but there are no deliberate blank bands between the image panels.
Framed grid with spacing and an outer border
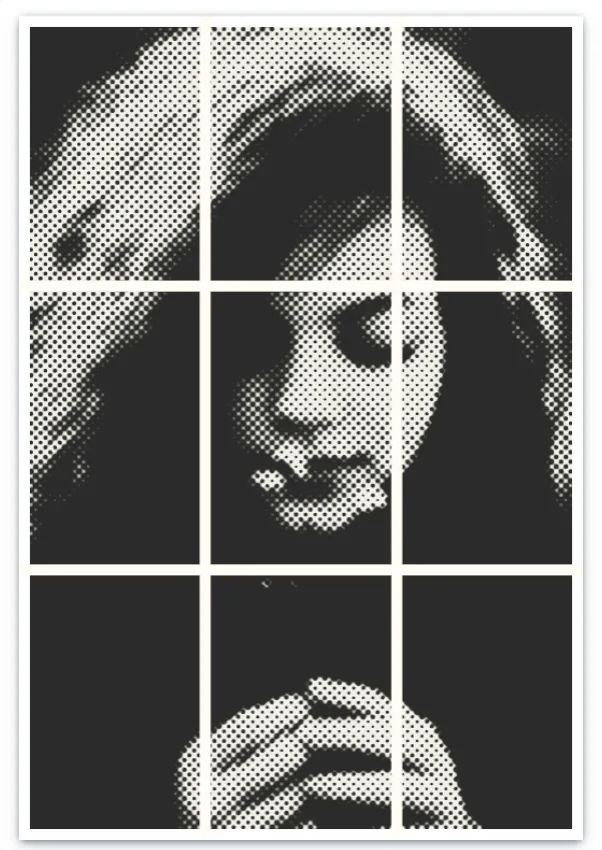
In Framed grid, the blank bands are part of the finished poster. Keep them when trimming, then join the sheets without covering the bands or leaving extra space between the paper edges. You do not need to mount separate panels with open gaps between them: the spacing is already included on the sheets.
The example below has three columns and three rows, with blank spacing between the panels and a white outer border. If you select an outer border, keep it when trimming the final perimeter too.
Use the assembly guide
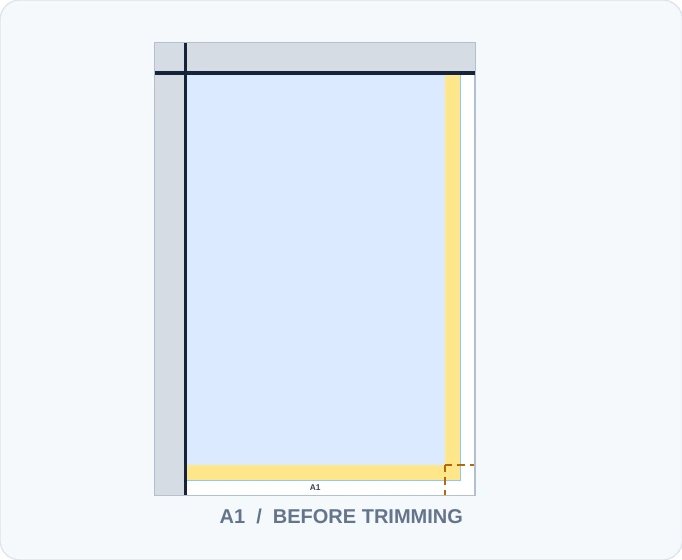
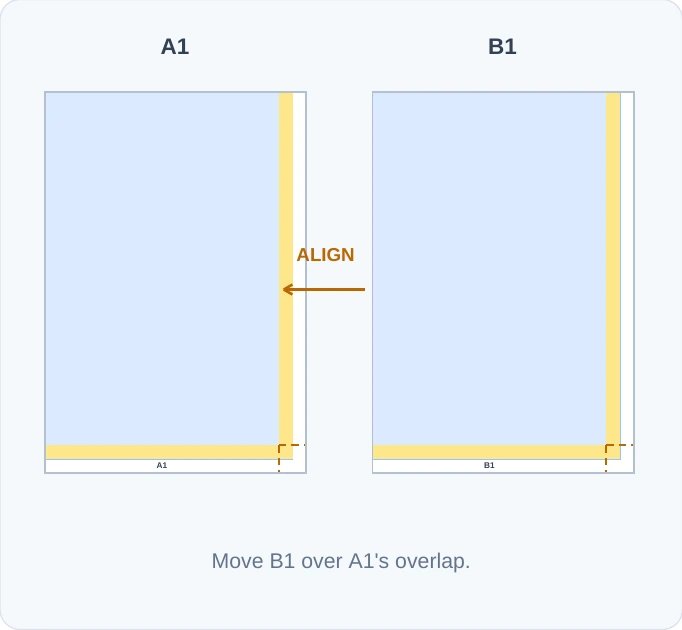
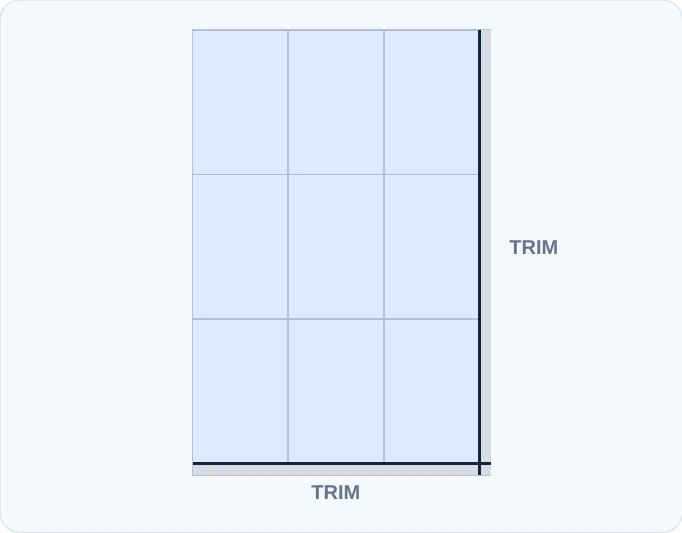
Download the assembly guide beside the PDF download in Block Poster Maker, or in Review & download in the full editor. The guide illustrates a 3 × 3 example; use your own cut guides and Printed sheets preview for your layout. Blue and yellow are preview colors, not printed overlays.
Read the page labels
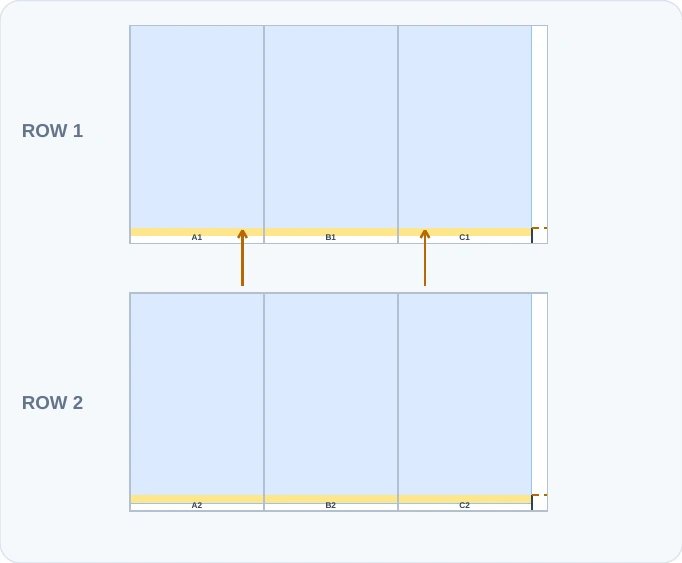
Columns use letters and rows use numbers:
| A1 | B1 | C1 |
|---|---|---|
| A2 | B2 | C2 |
Complete each row from left to right, then attach rows from top to bottom.
Read the cut guides on each sheet
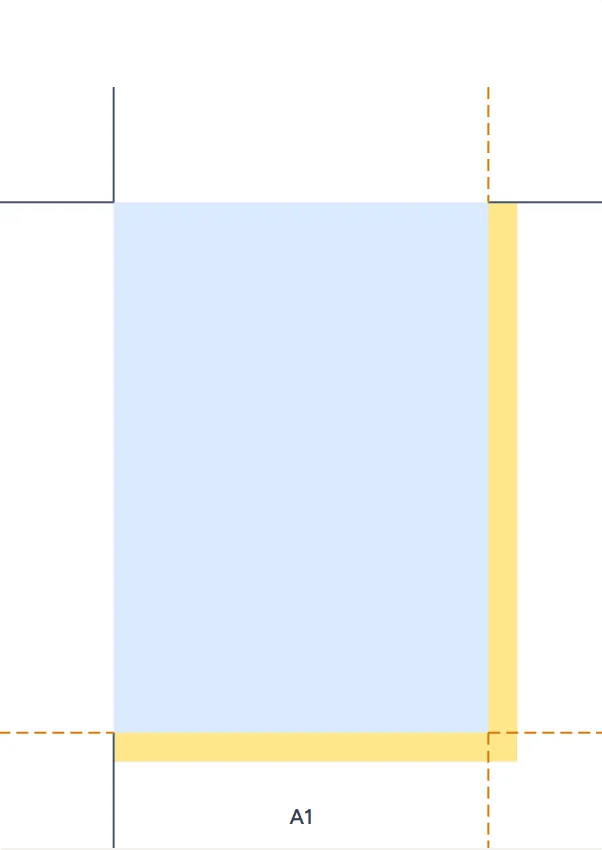
- Trim the top and left edges of each sheet at the solid cut guides.
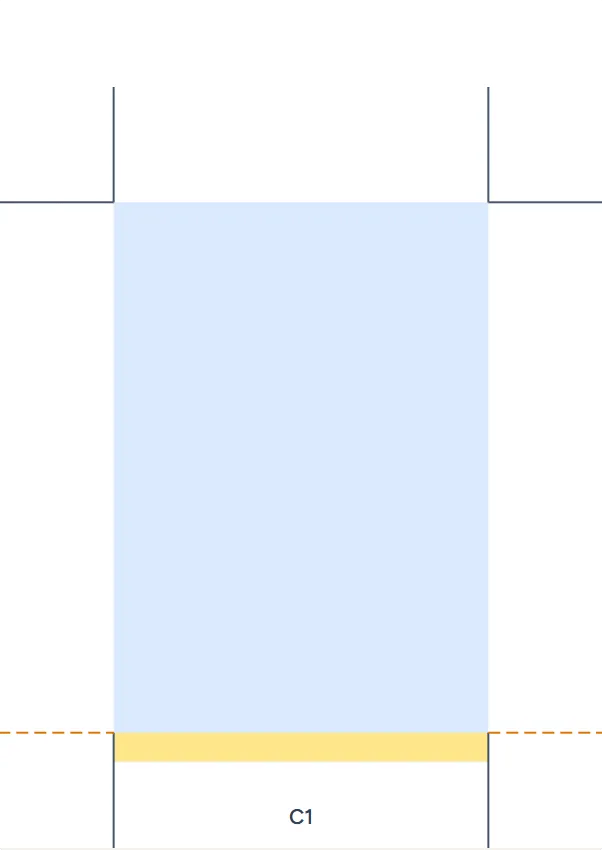
- On the last sheet in a row, also trim the right outside edge.
- On every sheet in the last row, also trim the bottom outside edge.
- For overlapping edges, keep the repeated right and bottom image strips on sheets that are not at those outer boundaries. The preview colors these retained overlap strips yellow.
- For an edge-to-edge join, trim each incoming sheet to its unique image edge.
- For a framed grid, follow the solid cut guides and retain the printed spacing between image panels.
In this 3 × 3 Seamless poster with overlap example, A1 needs top and left cuts while its right and bottom overlap strips remain. C1 is also at the end of its row, so its right edge is trimmed. C3 is the bottom-right sheet, so trim all four sides of the sheet.

Use scissors, a rotary cutter, or a craft knife on a suitable cutting surface. Keep hands clear of the cutting path and supervise children using sharp tools.
Align and attach
For overlapping edges, place the trimmed incoming edge over the repeated image strip, use the alignment marks to match it to the preceding sheet, then attach it with glue or tape. For an edge-to-edge join, align the two unique image edges directly before taping them from the back.
For Framed grid, keep the blank spacing on the preceding sheet and bring the next trimmed sheet up to its edge without overlap. Tape the join from the back. Check that the blank bands line up across rows and columns before attaching the next row.
Finish the outer edge
After the complete grid is aligned, trim the final outside boundary. Keep any selected outer border inside that boundary. An Exact size poster may have partial rows or columns at either edge; follow the outer trim marks rather than the paper edge.
Troubleshooting
If the image jumps at a seam, first check page order and whether the PDF was printed at Actual Size. If one strip is duplicated too widely, check which sheet's margin was trimmed. If a Framed grid band is too narrow or missing, check whether it was trimmed away or covered by the next sheet. If it is too wide, check for an extra gap between the paper edges.